Picture Frame Walls Ideas: 9 Layouts That Work
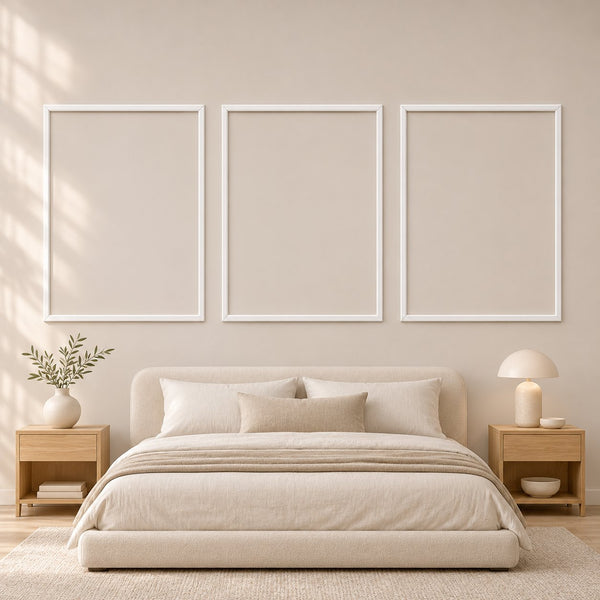
Picture frame walls ideas work best when the frames follow the room’s proportions, maintain consistent spacing, and relate to nearby furniture or architectural features. Start by choosing one focal wall or a complete room treatment, then calculate the frame count and molding length before selecting a paintable kit.
Picture frame molding can make a blank wall feel more structured without adding shelves, artwork, or bulky paneling. The same basic trim can create traditional wainscoting, tall modern rectangles, nested frames, or a symmetrical accent wall. The nine layouts below show how to choose a design that fits the wall instead of forcing a generic grid into the available space.
1. Use Four Tall Frames for a Balanced Accent Wall
Four equal vertical rectangles are a dependable choice for a long living room, dining room, or bedroom wall. The repeated layout creates rhythm while leaving enough open space inside each frame for paint, artwork, or wall lights. This is one of the most adaptable picture frame accent wall ideas because it works with both narrow and wide molding profiles.
For a modern result, make the rectangles taller than they are wide and paint the molding the same color as the wall. A contrasting molding color produces a more decorative appearance, but it also makes small spacing differences easier to see.
2. Center the Layout on the Furniture
Picture frame molding on walls should relate to the objects placed in front of it. Behind a sofa, center the complete molding composition on the sofa rather than automatically centering it on the entire wall. Behind a bed, use the headboard as the visual center. A side table, floor lamp, or doorway can make the usable design area asymmetrical even when the wall itself is symmetrical.
Mark the furniture width with painter’s tape before planning the frames. The outer frames can extend slightly beyond a sofa or headboard, but the composition should still look connected to the furniture when viewed from the main entrance to the room.
3. Build a Floor-to-Ceiling Grid
Floor-to-ceiling picture frame paneling ideas create a more architectural wall treatment than lower wainscoting. Use one row of tall rectangles for a restrained look or combine upper and lower frames for a formal arrangement. Matching upper and lower frame widths keeps the grid orderly even when their heights differ.
Check the actual distance between the baseboard and ceiling before finalizing the layout. Existing baseboards can remain in place, but Trim Wall Haus does not sell baseboards, ceiling molding, or door trim. The available kits use paintable polystyrene molding or paintable MDF rather than solid wood.
4. Add a Chair Rail and Lower Frames
A chair rail picture frame layout separates the wall into upper and lower zones. A common approach places rectangular frames below the rail while leaving the upper wall smooth. This gives diy picture frame wainscoting a traditional structure without covering the wall with full sheets of paneling.
Choose the chair rail height in relation to furniture and switches instead of relying on a fixed universal measurement. In a dining room, verify that chair backs do not visually collide with the rail. Keep every lower frame the same distance from the baseboard, rail, and neighboring frames.
5. Use Nested Frames for More Depth
Nested molding places a smaller rectangle inside a larger one. It adds detail without requiring a second row of panels and works particularly well on a broad focal wall. The inner and outer rectangles should maintain an even gap on all four sides so the design reads as one intentional frame.
Nested modern picture frame wall molding ideas look cleaner when the trim and wall share one paint color. The shadows created by the two profiles supply the contrast. If the wall already has patterned wallpaper or several pieces of art, a single-frame design may feel calmer.
6. Adapt the Pattern Around Doors and Windows
Wall frame molding ideas do not require every panel in the room to have identical dimensions. A narrow section beside a window may need a narrower frame, while the main wall can use wider rectangles. Keep the gap between frames consistent even when their widths change.
Measure from the existing casing rather than the rough opening. Door and window trim should remain visually separate from the applied frames. Since the available products are wall molding kits rather than door casing, use them only for the decorative wall layout described by the selected product.
FREE WALL CALCULATOR
Plan your wall in 60 seconds
Enter your wall size. Get frame sizes, spacing, total molding length and your kit price. Save $20 on orders over $350 with code WALL20.
Calculate my wall Get a free design drawingShop Picture Frame Molding Kits
View all Picture Frame Ready to Assemble Wall Molding Kit, 3 Upper & 3...From $217.20Choose options
 Nested Frame Nursery Wall Molding Kit, Ready to AssembleFrom $300.00Choose options
 Nested Picture Frame French Trim Wall Molding Kit, 2 Frames, ...From $132.00Choose options
 Panel Molding by the Meter, 2.5 cm and 4 cm PolystyreneFrom $129.60Choose options
 Peel and Stick Wall Molding Kit, 3 Upper & 3 Bottom Picture F...From $90.00Choose options
 Wall Panels for Living Room, Flat Wall Molding KitFrom $246.00Choose options
 Box Molding Kit, Shadow Box 2 Upper, 1 Center & 2 Bottom FramesFrom $188.40Choose options
 Picture Frame Molding Set, Double Frame 1 to 4 PanelsFrom $83.76Choose options
 Square Pre-Cut Flat Wall Molding Kit for Living AreasFrom $352.80Choose options
 Peel and Stick Wall Molding Kit, 2 Upper & 2 Bottom FramesFrom $96.00Choose options
 Quick Easy to Apply Peel and Stick Wall Molding, 3 Upper & 3 ...From $206.40Choose options
 Vertical Wainscoting Wall Molding Kit, 3 Vertical FramesFrom $108.00Choose options
7. Mix Picture Frames with Board and Batten
A picture frame board and batten arrangement combines vertical structure with enclosed rectangular details. It can work on an entryway wall or behind a dining bench where a plain grid would feel too formal. Use the vertical lines to establish the main rhythm, then fit the picture frame sections within that rhythm.
Picture frame molding and board and batten are related but distinct treatments. Traditional picture frames form complete rectangles. Board and batten emphasizes vertical strips, often connected by horizontal rails. A combined design should make that hierarchy clear rather than layering unrelated lines across the wall.
8. Use Double Frames for a Formal Room
Double frames are effective in dining rooms, sitting rooms, and entryways where a single rectangle may look too plain. Each panel contains an outer frame and a smaller inner frame, creating more shadow and detail. This design requires careful spacing because an uneven inner border is easy to notice.
Plan the outer rectangles first. Once their positions are confirmed, calculate each inner rectangle from the same inset measurement. Do not measure every inner frame independently from the wall because small differences can accumulate across the installation.
9. Choose One Oversized Frame for a Small Wall
A narrow wall does not always need several small boxes. One large centered rectangle can make the area feel calmer and give artwork, a mirror, or a console table a defined background. This approach is useful in an entryway or at the end of a hallway.
Leave enough open wall around the rectangle for it to read as an applied frame rather than perimeter trim. An oversized design can also be repeated on nearby narrow walls, creating continuity without forcing identical dimensions everywhere.
A 12 by 8 Foot Layout Calculation
Consider a wall that is 12 feet wide and 8 feet high. The wall width is 144 inches. For four equal frames, allow 3 inches at each outer edge and three 4-inch gaps between the frames. The available width for the frames is calculated as 144 minus 6 minus 12, which equals 126 inches. Divide 126 by four to get a frame width of 31.5 inches.
If each frame is 60 inches high, its perimeter is 2 times 31.5 plus 2 times 60, which equals 183 inches or 15.25 linear feet. Four frames require 61 linear feet of molding. Adding 10 percent for cutting allowance gives 67.1 linear feet. A centered 60-inch frame on a 96-inch-high wall leaves 18 inches above and 18 inches below.
| Calculation item | Result |
|---|---|
| Wall size | 144 inches wide by 96 inches high |
| Outer margins | 3 inches on each side |
| Interior gaps | Three gaps at 4 inches each |
| Frame size | 31.5 inches wide by 60 inches high |
| Total molding | 61 linear feet before allowance |
| Total with 10 percent allowance | 67.1 linear feet |
This calculation is a planning example, not a substitute for checking the dimensions and included components of a selected kit. Use the picture frame molding calculator to compare layouts, then confirm the complete wall area with the wall square footage calculator.
How to Choose Spacing and Molding Width
Picture frame wainscoting spacing should be consistent within each visual group. Start with the obstacles that cannot move, including corners, outlets, switches, windows, and furniture. Establish the outer margins next, then divide the remaining width among the frames and interior gaps.
A 2.5 cm or 1-inch profile can suit smaller rectangles or walls with several panels. A 4 cm or 1.6-inch profile has more visual weight and can suit broad frames or tall walls. Several Trim Wall Haus kits offer both widths, but the available options differ by product.
If you are comparing pre made picture frame moulding or searching for picture frame molding for sale at retailers such as Lowe’s, compare more than the front profile. Check the material, paintability, included frame count, installation method, and whether the pieces arrive pre-cut or require layout and cutting on site.
Material and Paint Planning
Trim Wall Haus products use paintable polystyrene molding and paintable MDF. They are not solid wood. If you prefer the appearance commonly associated with painted wood paneling, these materials offer a paintable alternative without claiming to be hardwood.
Prepare the wall according to its existing surface and the installation method selected. Dry-fit the complete pattern before permanent installation. Confirm that all corners meet cleanly and that each rectangle is level. Paint choice can be monochromatic, lightly contrasting, or coordinated with wallpaper, but the product and wall should be prepared for the selected coating system.
Shop the Look
The following options cover complete upper-and-lower layouts, nested frames, adjustable panel counts, double frames, and custom-width accent panels. Prices are the current listed USD ranges supplied for these products and vary by configuration.
- Picture Frame Ready to Assemble Wall Molding Kit, 3 Upper & 3 Bottom Frames | Easy Installation: A six-frame arrangement for coordinated upper and lower panels. Available in 1-inch or 1.6-inch molding and non-adhesive or self-adhesive installation. $181 to $222.
- Nested Picture Frame French Trim Wall Molding Kit, 2 Frames, Self-Adhesive Paintable: Suited to the nested-frame idea, with single-frame or two-frame buying options. $110 to $172.
- Picture Frame Molding Set, Double Frame 1 to 4 Panels | Waterproof Wall Trim Kit: A double-frame design with one through four panel options and two installation types. $69.80 to $277.85.
- Precut Double Frame Trim Wall Molding Kit, 1 to 5 Panels | Self-Adhesive Easy Installation: A flexible choice for layouts requiring one through five double-frame panels. $60 to $350.
- Peel and Stick Board and Batten Picture Frame Molding Set | Easy Installation: Designed for a combined board-and-batten picture frame treatment, with one through three design sets. $115.30 to $191.63.
- Accent Wall Picture Frame Molding Package, Custom Panel Widths | Easy Installation: Offers panel widths from 60 cm or 23.6 inches through 120 cm or 47.2 inches. $53 to $93.
Browse all Picture Frame Molding Kits to compare layouts, molding widths, panel quantities, and installation options. Orders are processed in 2 to 3 business days, followed by 2 to 4 business days for delivery. Shipping is free to the United States, Canada, United Kingdom, Ireland, and European Union, with a 14-day return period.
Frequently Asked Questions
Should picture frame molding be the same color as the wall?
It can be. A single color emphasizes the molding’s shadows and usually creates a quieter, more modern finish. A contrasting color makes the grid more prominent and suits rooms where the wall treatment is intended to be the main decorative feature.
How many frames should go on a wall?
The correct count depends on the usable wall width, furniture position, and desired spacing. Divide the usable width only after subtracting outer margins and the gaps between frames. Four panels worked in the 12-foot example because the resulting 31.5-inch width created tall, balanced rectangles.
Can picture frame molding replace artwork?
Yes. A well-proportioned grid can be the primary wall detail. Artwork can also be centered inside selected frames, but its dimensions should be included during layout planning so it does not crowd the molding.
Is self-adhesive molding available?
Yes. Several listed kits offer self-adhesive and non-adhesive installation choices. Confirm the selected option on the individual product page before ordering because availability and price vary by configuration.
Ready to transform your wall?
Pre-cut, factory primed kits. Free shipping. $20 off orders over $350 with code WALL20.
Calculate my wall Shop Picture Frame Molding Kits