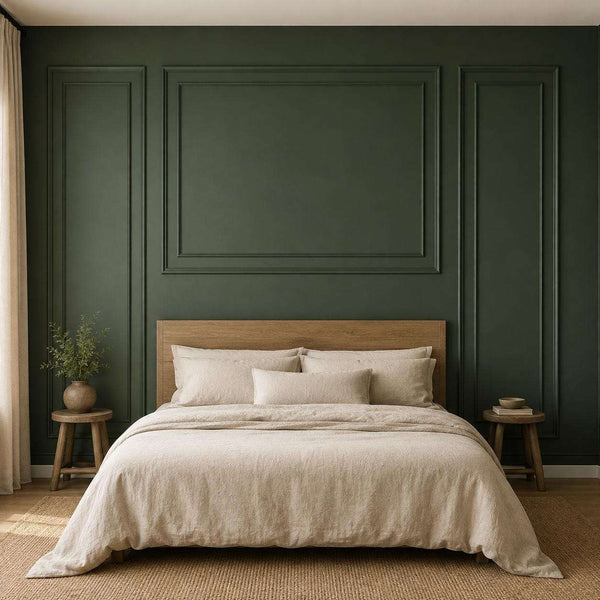
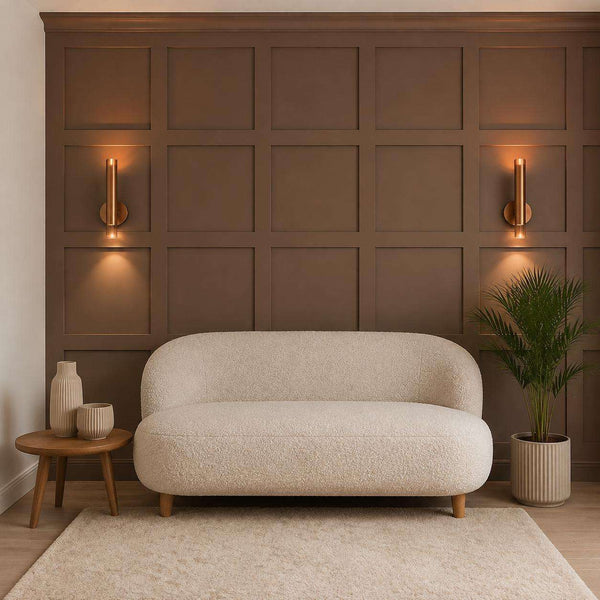
Board and Batten Wall DIY: Plan, Measure and Install
A board and batten wall DIY project succeeds when you map the wall, calculate equal openings, and dry-fit every piece before installation. For a 12 ft by 8 ft wall, a six-bay, full-height layout with seven 8 ft verticals and two 12 ft rails requires 80 linear ft of molding before adding a cutting allowance.
The design can be built with paintable MDF or paintable polystyrene molding. Trim Wall Haus does not sell solid wood molding, so homeowners seeking a wood-style board and batten look should consider these paintable alternatives and select a color that complements the room.
DIY Board and Batten Walls: Start With the Wall
Measure the wall at the top, middle, and bottom because walls are not always perfectly square. Use the smallest confirmed width when planning a fitted layout. Record the usable height separately, especially when the design must meet an existing baseboard, window trim, outlet, or built-in feature.
A 12 ft wide by 8 ft high wall measures 144 by 96 inches and covers 96 square ft. That square-foot figure helps estimate paint and understand the scale of the accent wall, but the molding order should be based on linear dimensions and the selected kit configuration.
Before choosing the number of bays, mark fixed obstacles on a simple sketch. A vertical molding strip that lands on the edge of an outlet creates an awkward cut. Moving the entire grid slightly or changing the number of openings can produce a cleaner result while preserving visual balance.
The wall square footage calculator can confirm the wall area, while the board and batten calculator helps turn the planned layout into a material estimate.
Calculate Equal Board and Batten Spacing
Spacing should be calculated from the clear openings, not by placing vertical strips at arbitrary intervals. For a layout with molding at both outside edges, subtract the combined width of all vertical pieces from the wall width. Divide the remaining width by the number of openings.
Consider a 144-inch wall with six openings and seven vertical pieces. If the molding is 1.6 inches wide, the verticals occupy 11.2 inches. The remaining 132.8 inches divided by six creates clear openings of approximately 22.13 inches. If 3.9-inch molding is used instead, the verticals occupy 27.3 inches and each clear opening becomes approximately 19.45 inches.
| Planning item | Calculation | Result |
|---|---|---|
| Wall area | 12 ft × 8 ft | 96 square ft |
| Seven full-height verticals | 7 × 8 ft | 56 linear ft |
| Top and bottom rails | 2 × 12 ft | 24 linear ft |
| Total before allowance | 56 ft + 24 ft | 80 linear ft |
| Total with a chosen 10% allowance | 80 ft × 1.10 | 88 linear ft |
This 80 ft model assumes the verticals run the full height while the rails span the full width. If the rails will be cut to fit between the verticals, subtract the intersections when preparing the final cut list. The optional 10% allowance is a planning choice for cuts and mistakes, not a required quantity for every room. If the verticals will stop at a chair rail instead of running full height, the Half Wall Paneling Kits use the same opening math on the lower part of the wall.
Convert the Wall Width Into Kit Sets
The Shaker grid kits include Panel Set choices labeled from 120 cm or 47.2 inches for one set through 600 cm or 236.2 inches for five sets. Treating those listed spans as nominal wall width, a 144-inch wall requires 144 ÷ 47.2 = 3.05 one-set spans. Because three sets are listed at 141.7 inches, they are about 2.3 inches short of the wall width. The four-set option is listed at 189 inches, so the layout would need to be trimmed or rebalanced for the actual wall.
The listed starting price is $69.80, and the smallest listed span is 47.2 inches, which equals approximately 3.93 ft. Dividing $69.80 by 3.93 gives a starting planning reference of about $17.75 per nominal ft of wall width. This is not a quote for a 12 ft wall because the final price changes with the Panel Set, molding width, and installation type selected on the product page.
Choose MDF or Polystyrene Molding
Paintable MDF works well when the goal is a substantial, furniture-like grid with clean rectangular lines. Some listed MDF kits use molding that is 75 mm wide and 8 mm thick, while other kits offer widths such as 4 cm, 7 cm, or 10 cm. Wider profiles reduce the clear opening between verticals, so the molding width must be included in the spacing formula.
Paintable polystyrene molding offers another way to create the board and batten appearance without claiming that the installation is solid wood. Confirm the material, molding dimensions, surface preparation, and compatible paint for the selected product before beginning work. Products also differ in whether they are factory primed, unprimed, non-adhesive, or available with a self-adhesive option.
FREE WALL CALCULATOR
Plan your wall in 60 seconds
Enter your wall size. Get frame sizes, spacing, total molding length and your kit price. Save $20 on orders over $350 with code WALL20.
Calculate my wall Get a free design drawingShop Board and Batten Kits
View all Board and Batten Wall Kit, Shaker Grid 1 to 5 SetsFrom $83.76Choose options
 Bedroom Board and Batten Picture Frame Wall Molding Set, Quee...From $209.29Choose optionsShaker Board and Batten Grid Wainscoting Kit, 1 to 5 SetsFrom $83.76Choose options
 Square Grid Board and Batten Accent Wall KitFrom $302.89Choose options
 Accent Board and Batten Design Wall Covering Kit, Factory PrimedFrom $728.40Choose options
 Decorative Board and Batten Wall Accent Molding KitFrom $930.00Choose options
 Pre-Cut Board and Batten Wall Trim Panels, Easy DIY Wall Moul...From $879.60Choose options
 Paintable Pre-Cut Wall Design: Ready to Assemble Board & Batt...$1,008.00Choose options
 Heritage DIY Board and Batten Panels, Pre-Cut MDF for Fast In...$697.20Choose options
 DIY Hassle-Free Board & Batten Wall Makeovers$618.00Choose options
 Quick Install MDF Board and Batten Panels, Trim Wall Molding ...$710.40Choose options
Plan and Install the Layout
1. Create a measured elevation
Draw the wall as a rectangle and add every permanent feature. Write the full width, usable height, selected molding width, number of verticals, and calculated clear opening directly on the sketch. Decide whether the design will cover the full wall or stop at a chosen height.
2. Test the layout with temporary marks
Mark the outside edges and centerline, then transfer each calculated opening across the wall. Painter’s tape can help represent the molding width before material is installed. View the taped layout from the room entrance and from the primary seating or sleeping position.
3. Confirm the product configuration
Match the wall sketch to the kit’s listed dimensions and options. Do not assume that a one-set price can simply be multiplied to obtain the price of a larger configuration. Choose the required Panel Set, molding width, design size, and installation type on the product page.
4. Dry-fit before fastening
Place the cut components against the wall and confirm that the openings remain equal. Check corners, outlets, and the meeting point with existing trim. Numbering the back of each piece can preserve the planned order during installation.
5. Follow the selected installation method
Use the instructions supplied with the chosen non-adhesive or self-adhesive configuration. The wall should be clean, sound, and suitable for the specified method. If electrical components must be moved or altered, use a qualified professional rather than modifying them as part of the decorative installation.
6. Prepare the paint finish
Confirm whether the selected kit is factory primed, unprimed, or otherwise paint-ready. Fill and finish visible joints as appropriate for the material and product instructions, then apply compatible coatings. Painting the molding and wall the same color emphasizes the shadows of the grid, while contrasting colors make the geometry more prominent.
Common Layout Errors to Avoid
- Measuring only one part of the wall and missing a width difference near the floor or ceiling.
- Ignoring molding width when calculating the openings.
- Dividing the wall into equal centerlines but ending with unequal clear spaces.
- Ordering from square footage alone instead of checking linear dimensions and kit spans.
- Placing a vertical directly through an outlet or control without planning the detail.
- Assuming every listed price applies to every size and installation option.
- Calling paintable MDF or polystyrene solid wood when it is not.
Shop the Look
Choose a kit according to the wall width, preferred grid, molding profile, and installation type. Prices below are the supplied live Shopify price ranges; the selected product option determines the final price. View the complete Board and Batten Wall Kits collection before ordering.
Board and Batten Wall Kit, Shaker Grid 1 to 5 Sets | Self-Adhesive Wainscoting
Priced from $69.80 to $502.00. This configurable Shaker grid offers one to five Panel Sets, 4 cm or 10 cm molding, and non-adhesive or self-adhesive installation choices. It is useful when the wall width needs to be matched to a clearly listed set span.
Bedroom Board and Batten Picture Frame Wall Molding Set, Queen & King Size Molding Kit | Easy Installation
Priced from $174.41 to $193.58. Choose this set for a bedroom composition organized around a Queen or King size design. Both non-adhesive and self-adhesive installation options are listed.
Shaker Board and Batten Grid Wainscoting Kit, 1 to 5 Sets | Self-Adhesive Easy Installation
Priced from $69.80 to $502.00. The one to five set range supports different wall spans, while the 4 cm and 10 cm molding choices allow either a slimmer or more substantial grid.
Square Grid Board and Batten Accent Wall Kit | Pre-Cut MDF Easy Installation
Priced from $252.41 to $551.51. This pre-cut MDF kit suits a square-grid accent wall and offers 4 cm or 7 cm molding. Use the actual molding width when calculating clear square openings.
Accent Board and Batten Design Wall Covering Kit, Factory Primed | Pre-Cut & Ready to Assemble
Priced from $607.00 to $609.00. This factory-primed standard kit is pre-cut and ready to assemble, with non-adhesive and self-adhesive options listed. It is a practical choice when reducing on-site cutting is a priority.
DIY Hassle-Free Board & Batten Wall Makeovers | Pre-Cut MDF Panels for Easy Installation W:75mm x T:8mm
Priced at $515.00. This standard pre-cut MDF kit uses molding listed at 75 mm wide and 8 mm thick. The known profile dimensions make it easier to calculate the visible opening size before installation.
Ordering, Delivery and Returns
Orders are processed in 2-3 business days, followed by an estimated 2-4 business day delivery period. Shipping is free to the US, Canada, the UK, Ireland, and the EU. A 14-day free return period is available.
Board and Batten Wall DIY Questions
How many sets are needed for a 12 ft wall?
Using the listed 47.2-inch one-set span as the planning unit, 144 ÷ 47.2 equals 3.05, so four sets are needed to exceed the nominal wall width. Select the actual four-set product option and plan how its listed 189-inch span will be fitted to the wall.
Does a board and batten wall have to be solid wood?
No. A board and batten appearance can be created with paintable MDF or paintable polystyrene molding. Trim Wall Haus does not sell solid wood molding, so the product material should be described accurately when planning the project.
How do I keep all openings equal?
Subtract the total width of the vertical molding pieces from the wall width, then divide the remaining measurement by the number of clear openings. Mark and dry-fit the complete layout before installation.
Is a self-adhesive option available?
Several listed kits offer both non-adhesive and self-adhesive installation types. Availability depends on the specific product and selected configuration, so confirm the option on the product page.
Ready to transform your wall?
Pre-cut, factory primed kits. Free shipping. $20 off orders over $350 with code WALL20.
Calculate my wall Shop Board and Batten Kits